UV Mapping
UV mapping is a technique that helps add materials and textures to complicated polygon surfaces, giving them a more realistic look.
You can do this by using Maya’s UV Texture Editor (EDIT UVs | TEXTURE EDITOR in the main
menu).
The UV Texture Editor gives you very discrete control over how the texture maps to an object.
The UV Texture Editor unfolds the geometry into 2D flat surface and gives you more precise options of applying textures.
The UV Texture Editor gives you very discrete control over how the texture maps to an object.
The UV Texture Editor unfolds the geometry into 2D flat surface and gives you more precise options of applying textures.
Class Exercise - Cardboard Box
So I start with a simple cube, and an image to be wrapped around it.
Right click material attribute, add file from directory, and choose the image.
 |
| Add Image File |
Select ok and see the result.
 |
| Unwrapped Image |
Notice that maya has done a pretty good job at unwrapping the image, although its not perfect, this is where edit UV's texture editor comes in to fine tune the coordinates of the uv mapping.
 |
| UV Mapping |
Now in order to manipulate the UV mapping, you need to select the UV vertices and move them
into appropriate positions.
Note: The UV vertices will not affect your geometry as they are mapping coordinates
Right-click-hold on the UV wireframe and select UV..
Note* you can use the tools from the main window on the texture editor.
UV texture editor, move the texture vertices to match the objects,
 |
| Finished Box With Mapping |
X-Wing
So I found some mapping textures online for the x-wing...
 |
| X-Wing - UV Map |
Added all the map and then started positioning the nose map.
 |
| Positioning the nose map |
You can select desired faces/ objects etc. and then go to the UV editor to open the UV map with the selection highlighted as you can see above.
As well as editing the detail with the UV map positioning, I also realised that I had to remove some,
 |
| Remove detail |
To remove the detail on the wings I simply selected the faces of the wings and within the UV editor selected areas with lower detail, using move and scale functions.
You can select desired faces/ objects etc. and then go to uv editor to open the UV map with the selection highlighted.
AYou can add extra planes on the UV map by selecting the faces (for example) you require, and then shift-right click - add planar to highlight.
I was happy with the extra detail on the thrusters:
 |
| Thruster Detail |
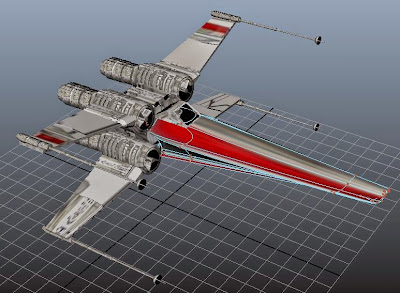
Here is the Final Design, I may come back at a later date but I am quite happy with the look at this point.
 |
| Final Design |
Maya is a fantastic piece of software that is so user friendly.
One final touch I thought about for when we start to animate the models, lets add some rocket boost effects
One final touch I thought about for when we start to animate the models, lets add some rocket boost effects
 |
| Boosters |
Ok so I came back, again. After creating glass textures to my Interceptor model, I thought I may as well add some to the X-wing.
So firstly simply add and place the shape.
So firstly simply add and place the shape.
 |
| Add Shape |
Then repeat the above settings for the texture added to it.
 |
| Front Window |
 |
| Rear Window |


No comments:
Post a Comment