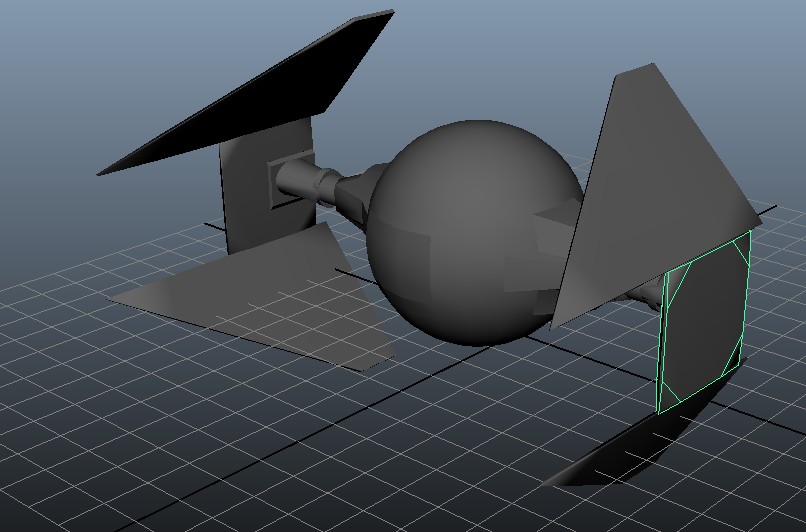
STAR WARS BEGINS
So the basics have been described in the previous post, now I am going to put those principles into practice. My first assignment is to create three star wars spaceship models. My first choice was the 'Dark Sides' Interceptor.I will continue to add notes and snapshots at various points along my Maya journey, any tips or advice or any problems I encounter I will make sure to log along the way.
Using the tools described previously (edit mesh, add divisions, extrude, move, scale, duplicate) Maya makes it really easy for you to create the initial object form. From manipulating shapes or adding new ones to it. This is called 'Blocking Out'. Creating a shape ready for detailing.
.
As well as always adding more objects to create a desired shape, move, scale and extrude tools can be used on faces and edges to do the same job just as efficiently.
Just take care when selecting what part of your model you actually want to modify.
When you are happy with the design of the model, organise all objects into a layer group.This allows you to easily select all objects within that group (#which is really handy#) among other tools you will find very useful.
Objects can be merged and attached to different objects, you can use the combine tool firstly, and then merge. The opposite can be achieved with the 'Separate' icon.
Vertices can be added manually between edges by using the cut tool. very handy, the cut tool can be snapped to faces or edges, and then when done can be realigned to straighten it off.
# Handy Tip - if you click off a selection that you weren't finished working on, simply hit undo (control-z) to select them again quickly.#
You can create an opening in an object by creating divisions within it, and then selecting faces that you want to be gone, and then hit delete.
Simply manipulate views, and rotate/scale/move the object into position.
I selected the front face and scaled it inwards slightly to create a more realistic effect.
Modelling an object can be made easier by either turning off certain layers around it, or simply moving it from the main object, on an X,Y or Z plane (making it easier to re position afterwards).I created a tube object, positioned it, and then duplicated it around the window partition,
* I did encounter a problem - when I positioned the window opening, some of the square faces of the ship body were showing through the front. To resolve this issue I selected these faces, and divided them into smaller segments, and then deleted the troublesome ones.
Once you have finished modelling you can position your object, life is made so much easier than always selecting nearby edges or faces constantly.
Once you get the hang of the basic functions in Maya (view adjusting, object creation and positioning, object manipulation) Maya makes it so easy for you to go into detail, and allows a beginner like me to create great models.
#Handy Tip - If you find that you want to reduce the amount of poly lines that you have created on an object, a quick tool is available, check the toolbar above the view port for a quick access tool.#
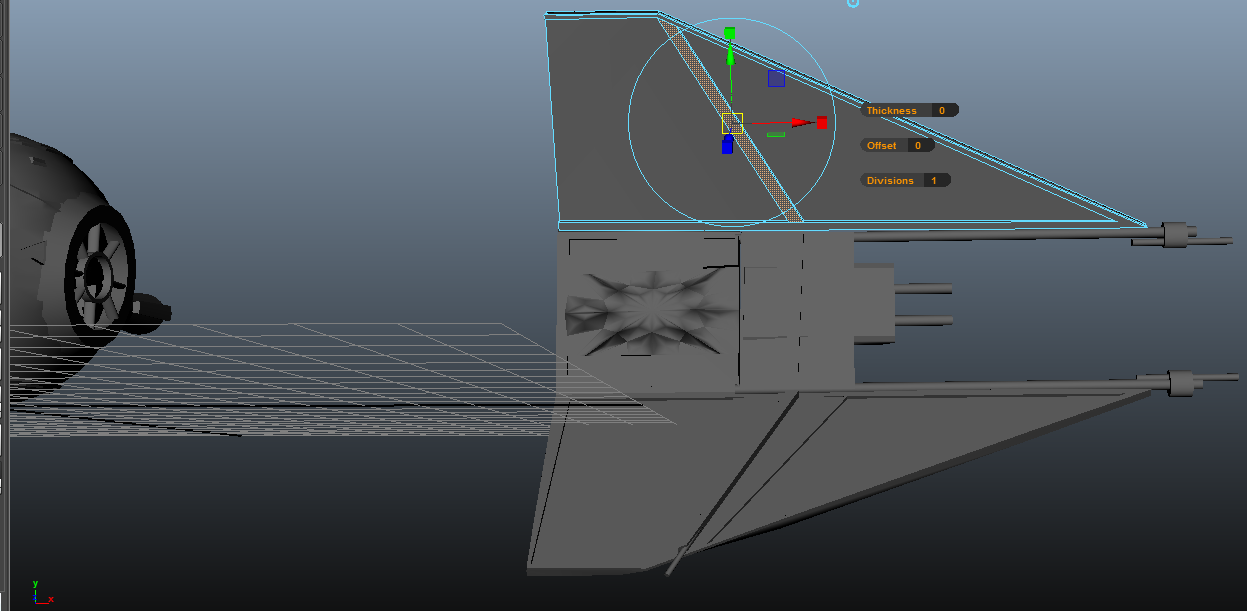
Wing Detailing
I recommend to always have a picture at hand to help you model to, when trying to replicate an existing model. here is the one that I was using.
You can see all of the detail on the wings and body. So I used previously mentioned techniques to detail my Interceptor.
I created all the poly lines with the cut tool, and created depth at all parts of the wings where needed.
Again I pulled away the wing from the main ship to make it easier to add detail.
Created detail to certain parts by selecting faces and using either the extrude, move or scale tools.
Created my Interceptors guns using the tube creation tool, and duplicating them for ease of positioning.
However when coming back to look at the model it was completely out of shape. The wings weren't the same shape at the top and the bottom. I did not want to try to completely remodel the whole wing to be exactly the same as the other.
I had to try and find a way to try and mirror my wing (easier said than done!).
After a little research I found that I could use within the edit menu, 'Duplicate Special. Then chose 'Instance', and then within the scale sub set choose a - in the axis that you require. I had to choose the z axis and it worked a treat.
However, my mirrored instance of the original object was completely black.
So that didn't work for me very well. By using 'Duplicate Special', all of the faces became inside out, and my mirrored object was not created properly, not being able to reflect any light.
With a little research I found a possible solution. With the object selected, I went to the 'Nomals' menu and used the reverse tool, that resulted in success! I was really happy for a split second,and then it became clear that the original wing that I used to mirror had turned black!
The next technique I came across was to use the 'Mesh - Mirror Geometry' tool. This worked also but created an object that was attached completely to the first. This meant that I was unable to work on my mirrored object individually and I could not position it. I tried several techniques ('Ungroup, Separate') but I could not find a way to make them separate objects.
I then tried the tool freeze transformations within the edit menu (I really didnt want to model the wing again to be similar to the first), set the 'normals' within the options to 'freeze normals', tried it with the 'Duplicate Special' tool,. Still the same effect!.
The answer to my problem is that when duplicating the object to a minus scale it turns everything inside out. The solution was to go into the lighting settings, and activate 'two sided lighting'. What a long winded event that was!
Now you can see my final design. I'm pretty happy with this one.


No comments:
Post a Comment